Creating Inbound Firewall Rules in Windows Defender Firewall with Advanced Security
In this post I will show you how to create basic inbound firewall rules in Windows Defender Firewall with Advanced Security
admin
1/4/2024
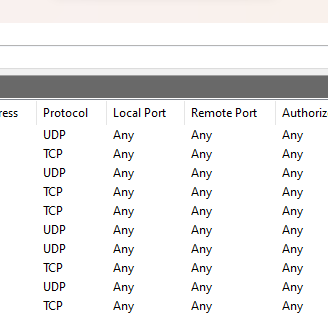
Hey everyone, the purpose of this blog post is to show you how to create inbound firewall rules on Windows servers and / or PCs. To begin open the Windows search bar in the bottom left of your screen and type "Windows Defender Firewall with Advanced Security" and press enter when it comes up. This will open a window that looks something like the following:
Once you are in this menu, look at the right hand side of the screen and under the "Inbound Rules" tab: (Under "Actions") select "New Rule...":

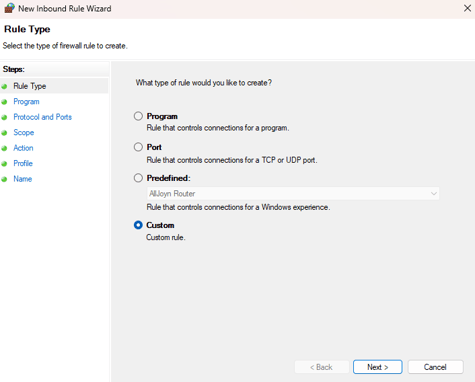
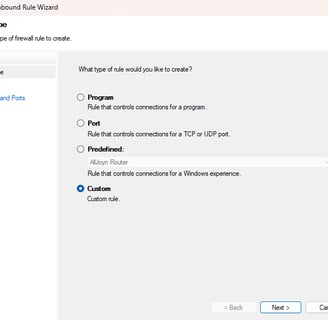
From this menu you will need to choose whether you want to create the firewall rule based on programs, port numbers, a predefined rule or a custom rule. We're going to be selecting "Custom" as the port and program options don't let you choose between inbound and outbound connections. Tick the radio button and select next and you'll be taken to the following options:
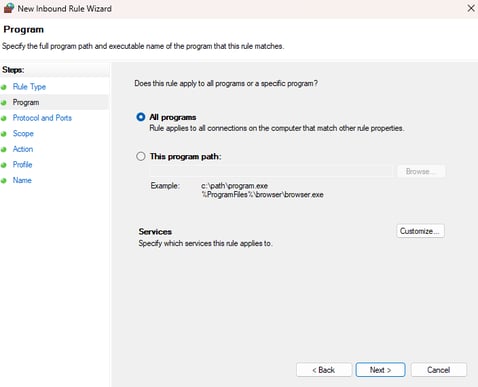
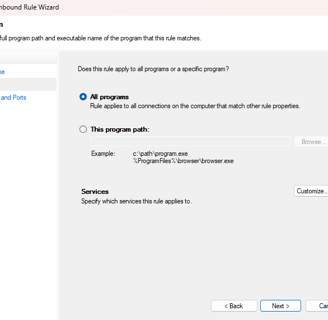
For the sake of simplicity, I am not going to be I will not be using a program for the scope of this firewall rule. (If you would like help with that, get in touch or ask for a more in depth tutorial). Click "Next" to get to protocols and ports:

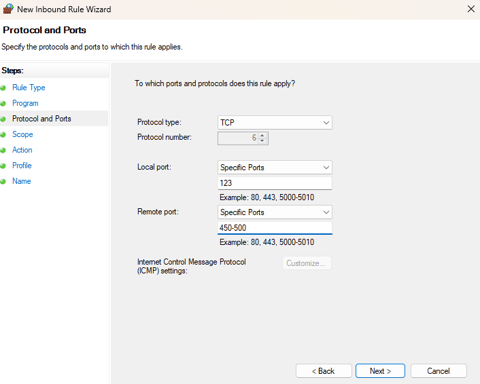
From this menu you can choose the protocol that you wish to apply the inbound rule to and the local and remote ports that you wish to be effected by the rule. For example, if you wanted to block TCP connections on local port 123 and remote ports 450-500, you would configure the page to look like the following, ensuring that you have selected "Specific Ports" on both drop down menus:
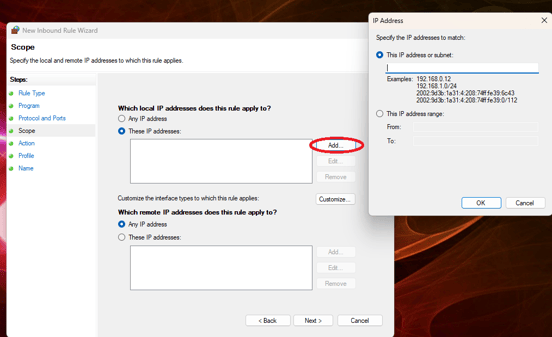
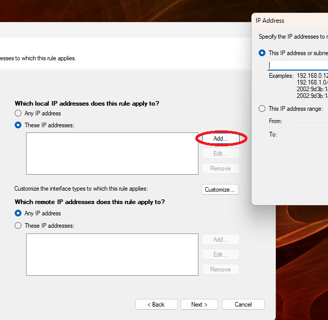
After entering the port information, click "Next" and you will be taken to the IP configuration menu (Basically where you're gonna enter the IP addresses that will be effected by the rule). Make sure that you have ticked the "These IP Addresses" radio buttons for the type of IP addresses you are going to be entering and then click "Add"
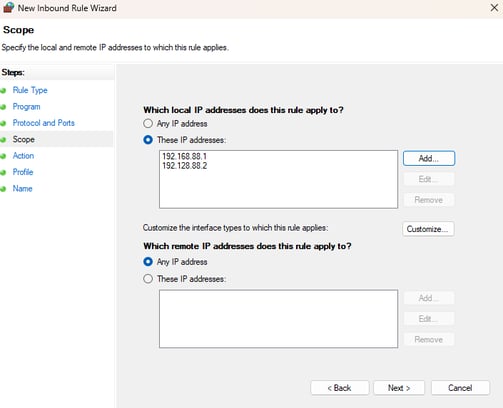
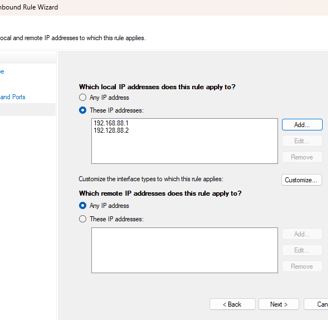
After you have entered all the IP addresses / ranges that you want to be within the scope of the rule, select "OK" and you should see the IP addresses within the "These IP addresses" field. In the example below I have selected "192.168.88.1" and "192.168.88.2" within the local IP addresses field:
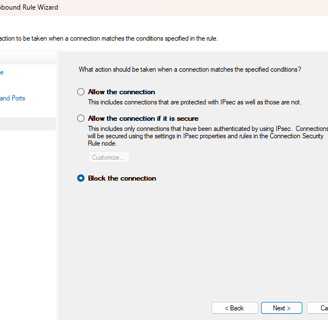
Upon clicking "Next", you will be taken to the "Action" window where we will be deciding what is done with in bound connections, that meet the criteria that we have just set. Here you can choose whether you want to allow the connection, allow it if it's secure or block it. Select the radio button for the option you want. For this tutorial, I will be blocking the connection:

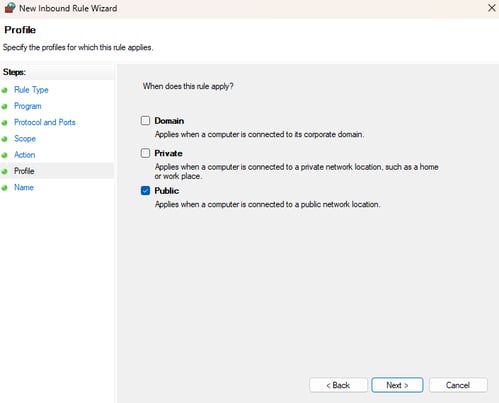
After clicking "Next", you will be taken to the profile menu, where you choose which network areas the rule will be in effect in. I only want my rule to be in effect, when on a public domain and so my settings reflect the following:
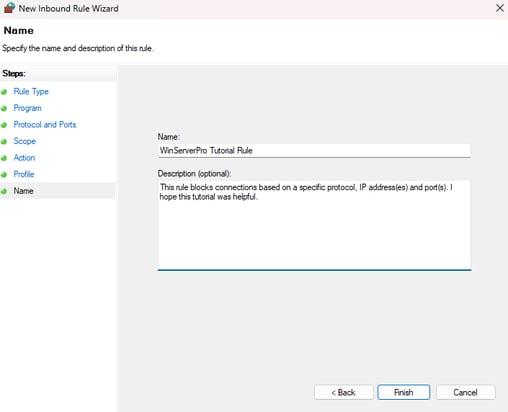
Click "Next" to head to the final step of the tutorial. Simply enter a name for the firewall rule and optionally a description:
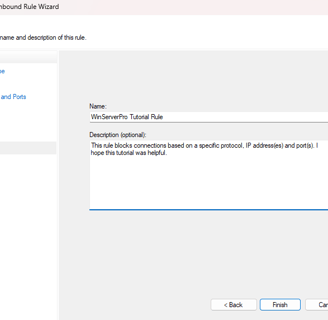
Click "Finish" and the firewall rule will be saved and applied. I hope this tutorial was helpful and if you need any support or think I got something wrong, drop an email below:
Get in touch:
©2023